
Do you have a whole bunch of ill-fitting clothes still taking up space in your closet? Once again I found myself reluctant to give away a pair of pants: they were from The Limited, bought in 2007, 2 sizes too small, but in great shape and buttery soft.
And, as I mentioned in my last shorts-to-skirt tutorial, I really need the warm-weather bottoms! I decided to use more of that stretch sparkle denim for my side panels. But this time I used the reverse side of the fabric which is a bit more gold than blue. Saucy!
 I followed the same procedure as last time for making this skirt. The only difference was that this time I did a blind-hem stitch on my machine!
I think I tried to do a blind-hem on my machine once before, but I decided to take this opportunity to really learn this skill. If you’re new to the process as well, here’s a tutorial on how to sew a blind hem by machine! Read on…
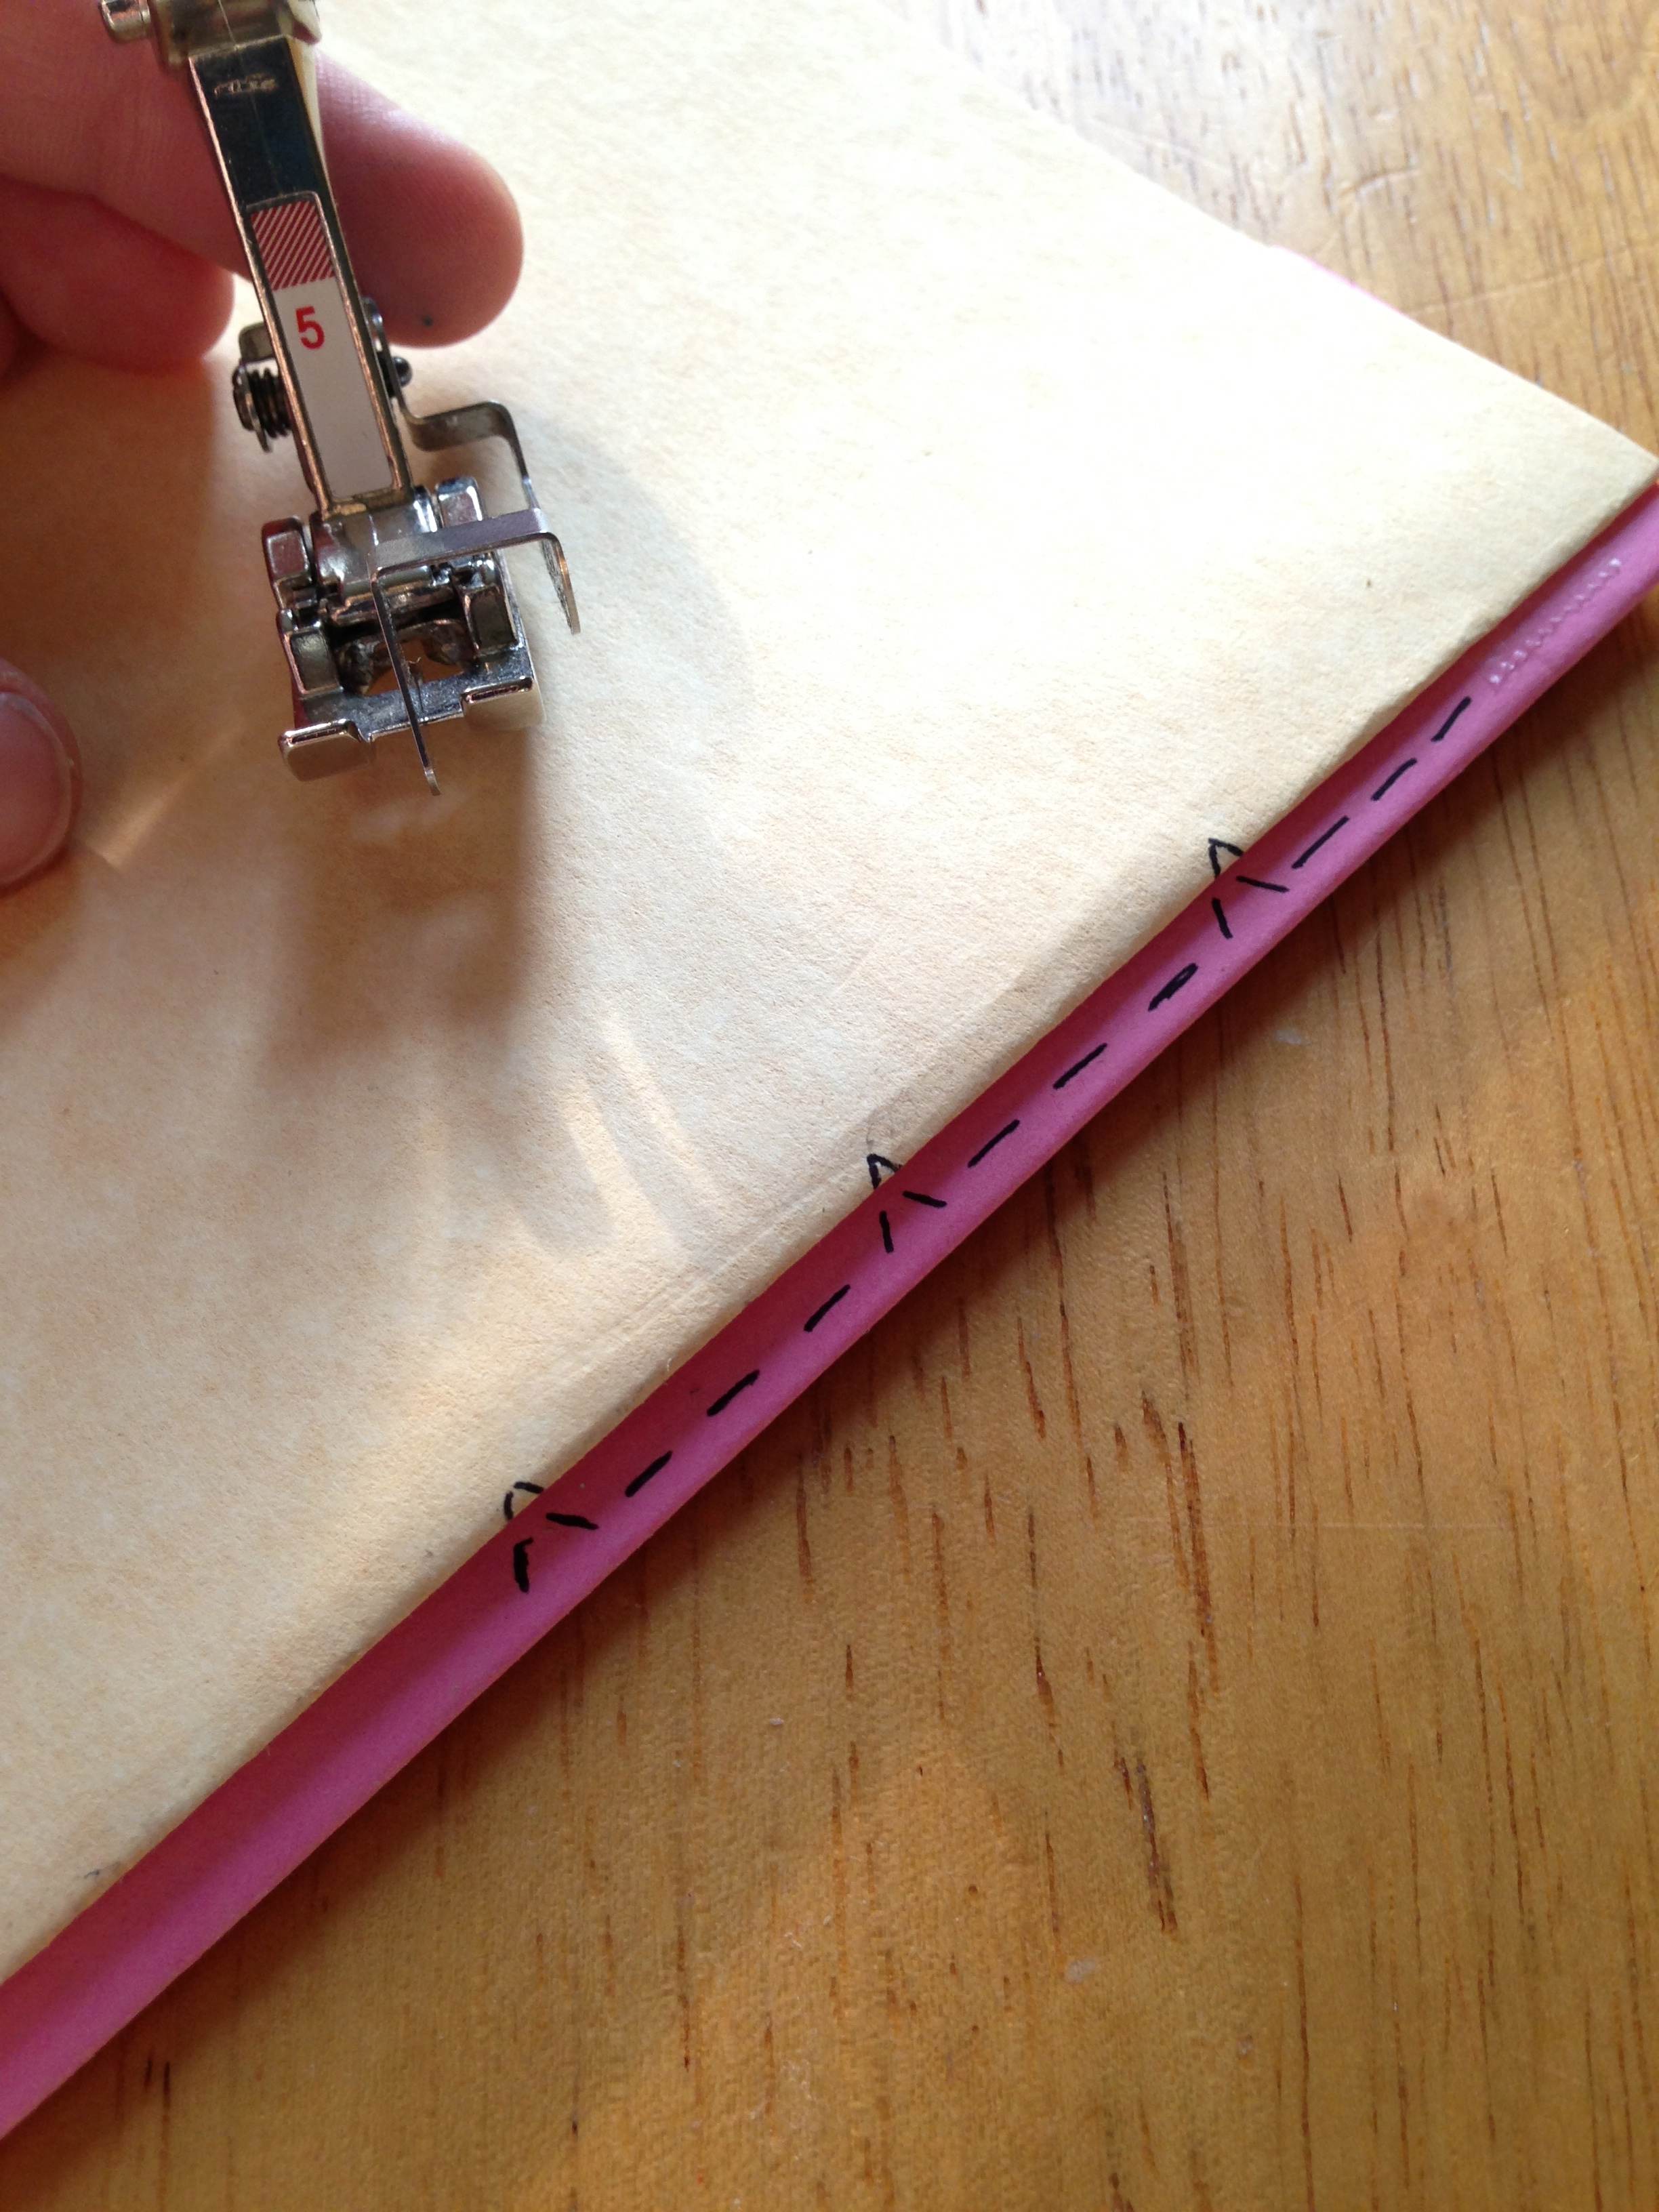
In order to machine stitch a blind-hem you will need the blind-hem foot for your machine, and your blind-hem stitch. For my Bernina, I need Foot #5 and stitch #9.
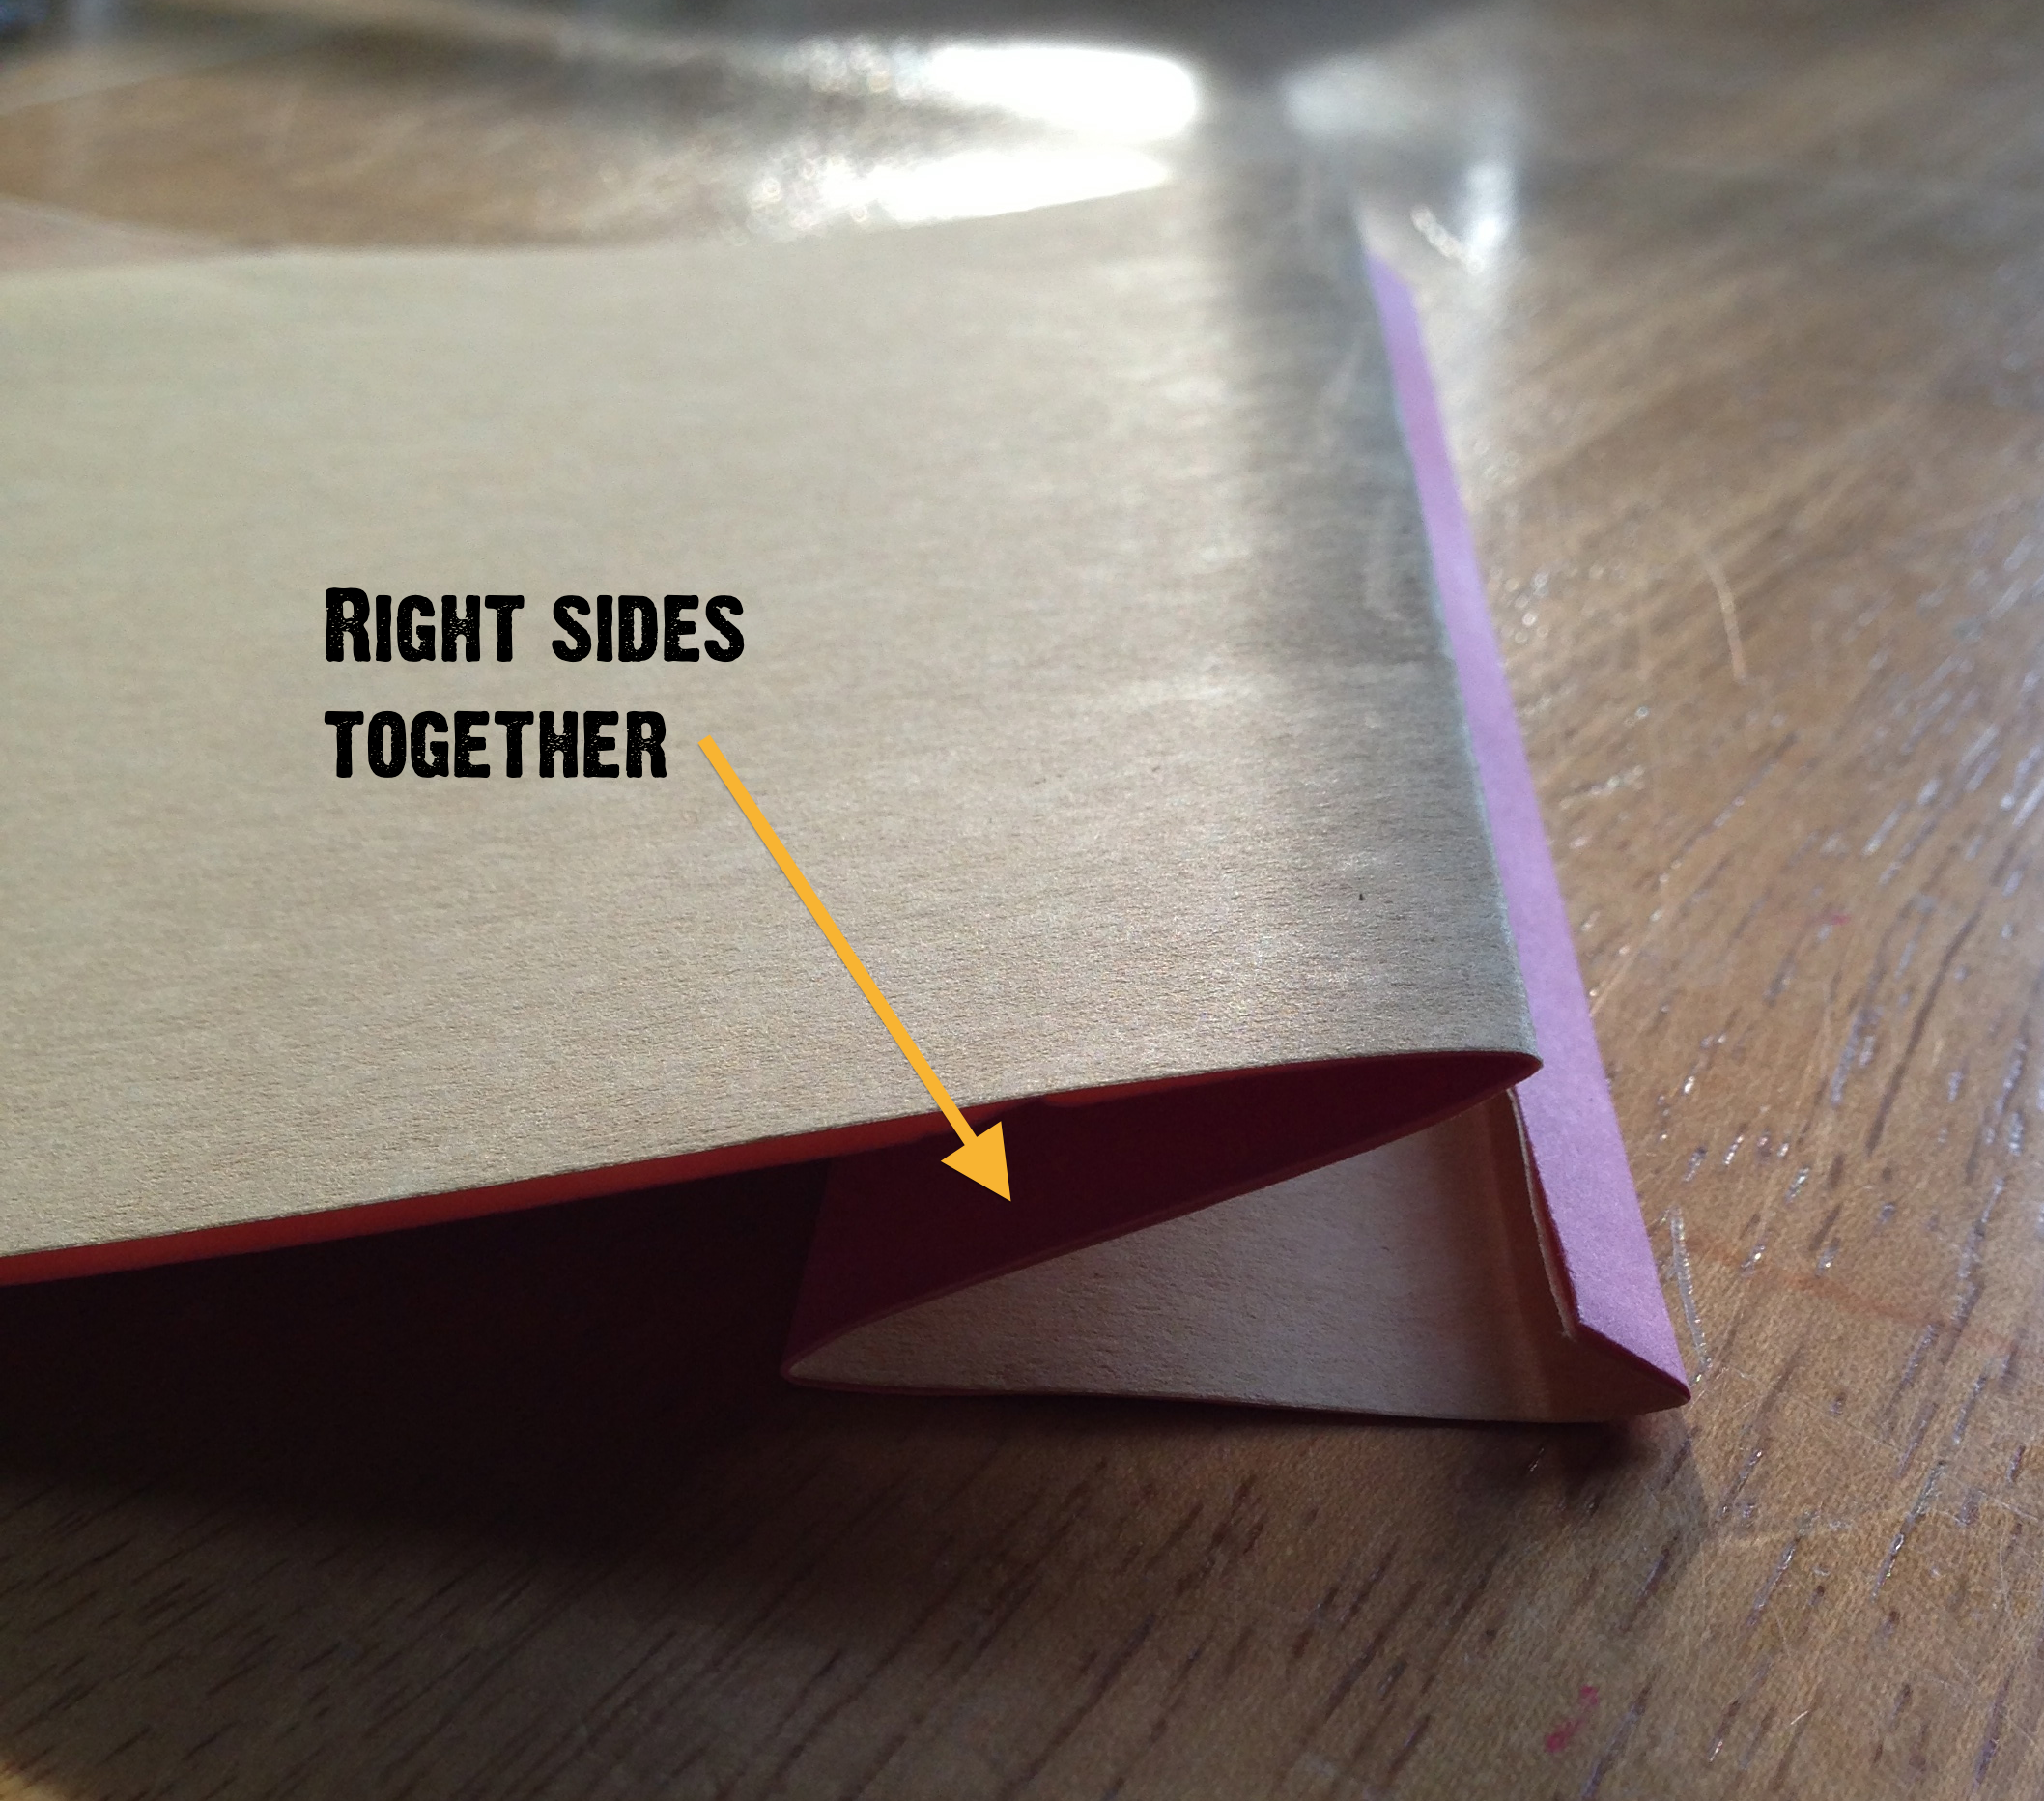
The first step is to fold and press your project to get it ready for sewing. For this tutorial, I’m going to show the folding process with pictures of paper. Pretend the paper is fabric: the tan is the wrong side and the pink is the right side of the fabric.
Step 1: Fold the raw edge of the fabric from the bottom of your project up 1/4 of an inch onto the wrong side of the fabric.

Then fold up the bottom again, enclosing the raw edge. You can fold up as much as you’d like in order to get your desired length for your project. 
Then you want to flip the folded-up fabric underneath. You’ll leave a little bit (like 1/6″) of the folded up fabric sticking out.
Give it all a good press and you’re ready to sew! Find your blind-hem foot for your machine, and your blind-hem stitch. For my Bernina, I need foot #5 and stitch #9. When sewing, have the guide buttressed up against the fold, to the right. The stitch pattern does a couple of running stitches on the pink fabric, for this example, then catches just a couple of threads onto the tan fabric. That one stitch at the peak of the triangle is what will be visible from the right side of the project.
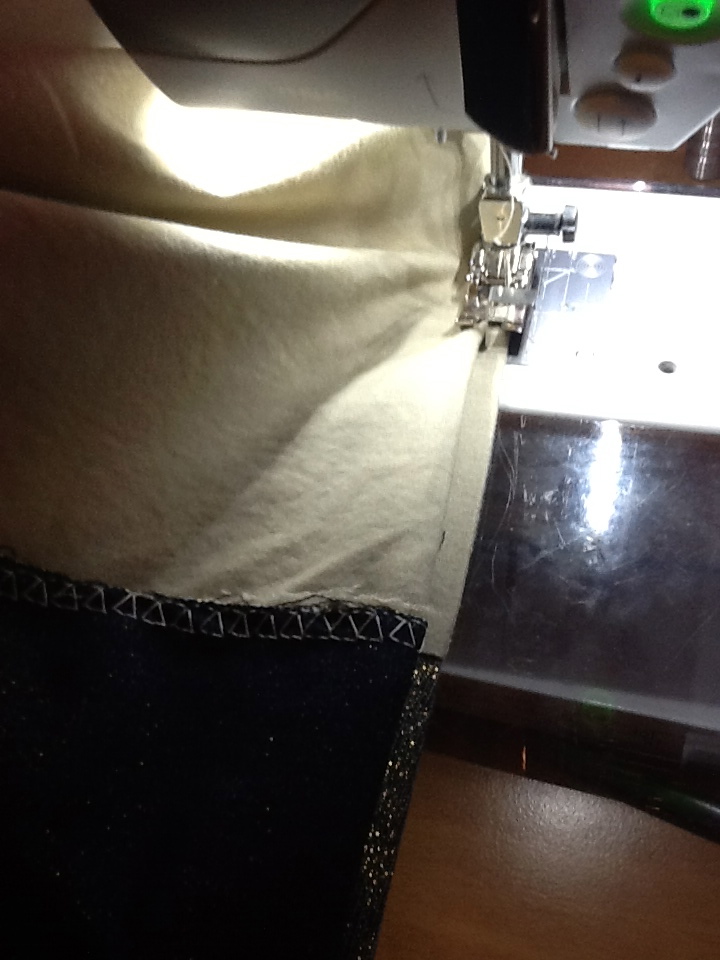
Action shot of sewing a blind-hem:
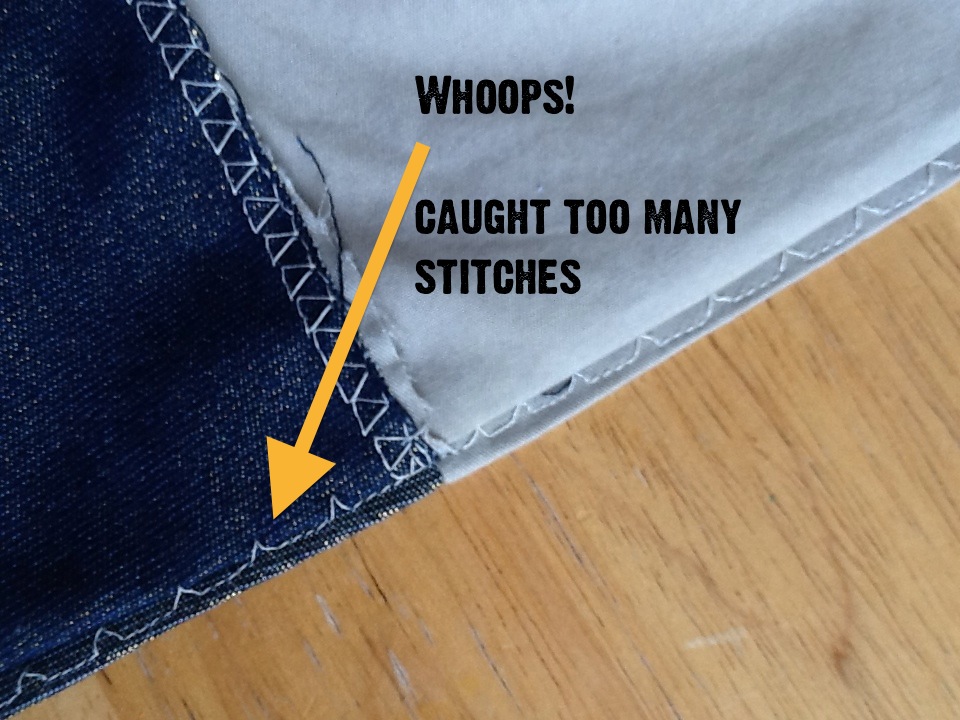
Remember to take breaks from sewing the hem to check your stitch placement. The point of the triangle should JUST BARELY be on the wrong side of your fabric. You can see my error here:
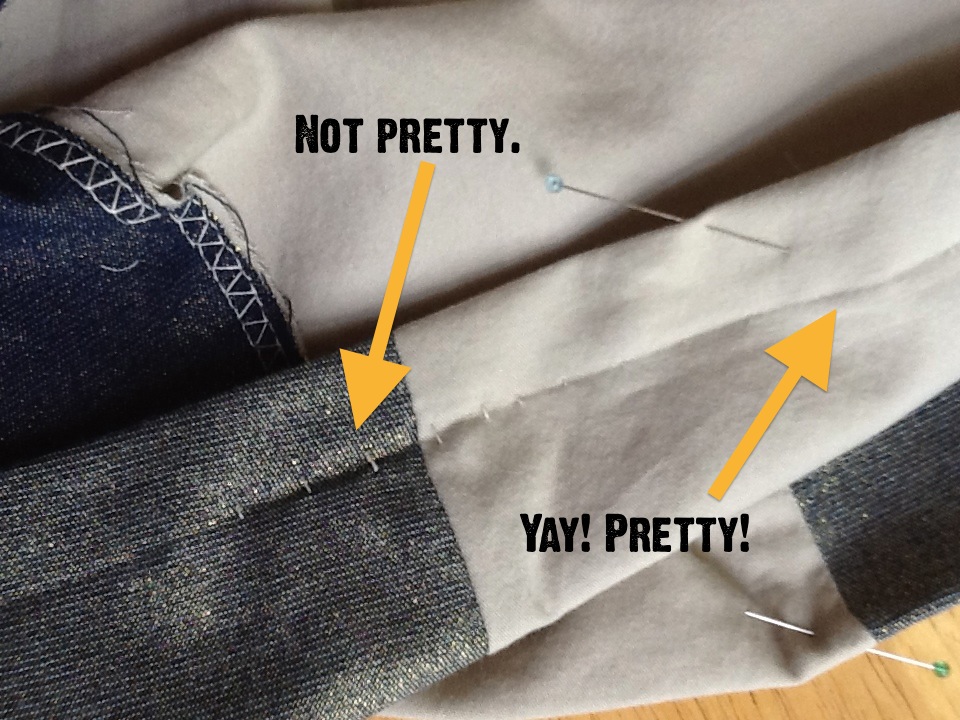
Just pick out those couple of bad stitches and start again. You’ll have a really sharp looking hem in no time!


