Category Archives: Techniques

Improv Arrow Quilt Block Tutorial

A group within the Ann Arbor Modern Quilt Guild is working together on a charity quilt featuring improvisational arrow blocks.  Today I grabbed some scrap fabric and experimented with a piecing strategy.

For my group, these are not instructions and certainly feel free to create your arrow blocks however you’d like!  But let me offer this Improv Arrow Quilt Block Tutorial just in case it’s useful.

-1

Read more for the tutorial.

Continue reading

2 Comments

Filed under A2MQG, Pattern, Techniques, Tutorial

Folded Flock Quilt

flock-brand1

Ooooo it’s been a busy summer.  I made this quilt a while ago and have been meaning to blog about it forever.  But then this morning I got some great news – Folded Flock is going to be in the International Quilt Show’s Modern Quilt Guild showcase in Houston!

This quilt features the Botanics line by Carolyn Friedlander.   The quilting was done on my walking foot.  One large arrow shape echoed many times.

flock-brand2

This quilt was inspired by origami cranes and this rug designed by Lesley Barnes. I sketched out my idea on the computer.  Birds and arrows.birds-sketch


I made the wings, head, body for my birds and used extra background fabric to flesh them out into rectangular blocks.   I’ve made another post – here – describing more about how I slabbed together fabric to make my bird and arrow blocks!  Thanks for stopping by!bird-paper-2

10 Comments

Filed under Fabric, Inspiration, Pattern, Quilting, Techniques

Folded Flock – Process

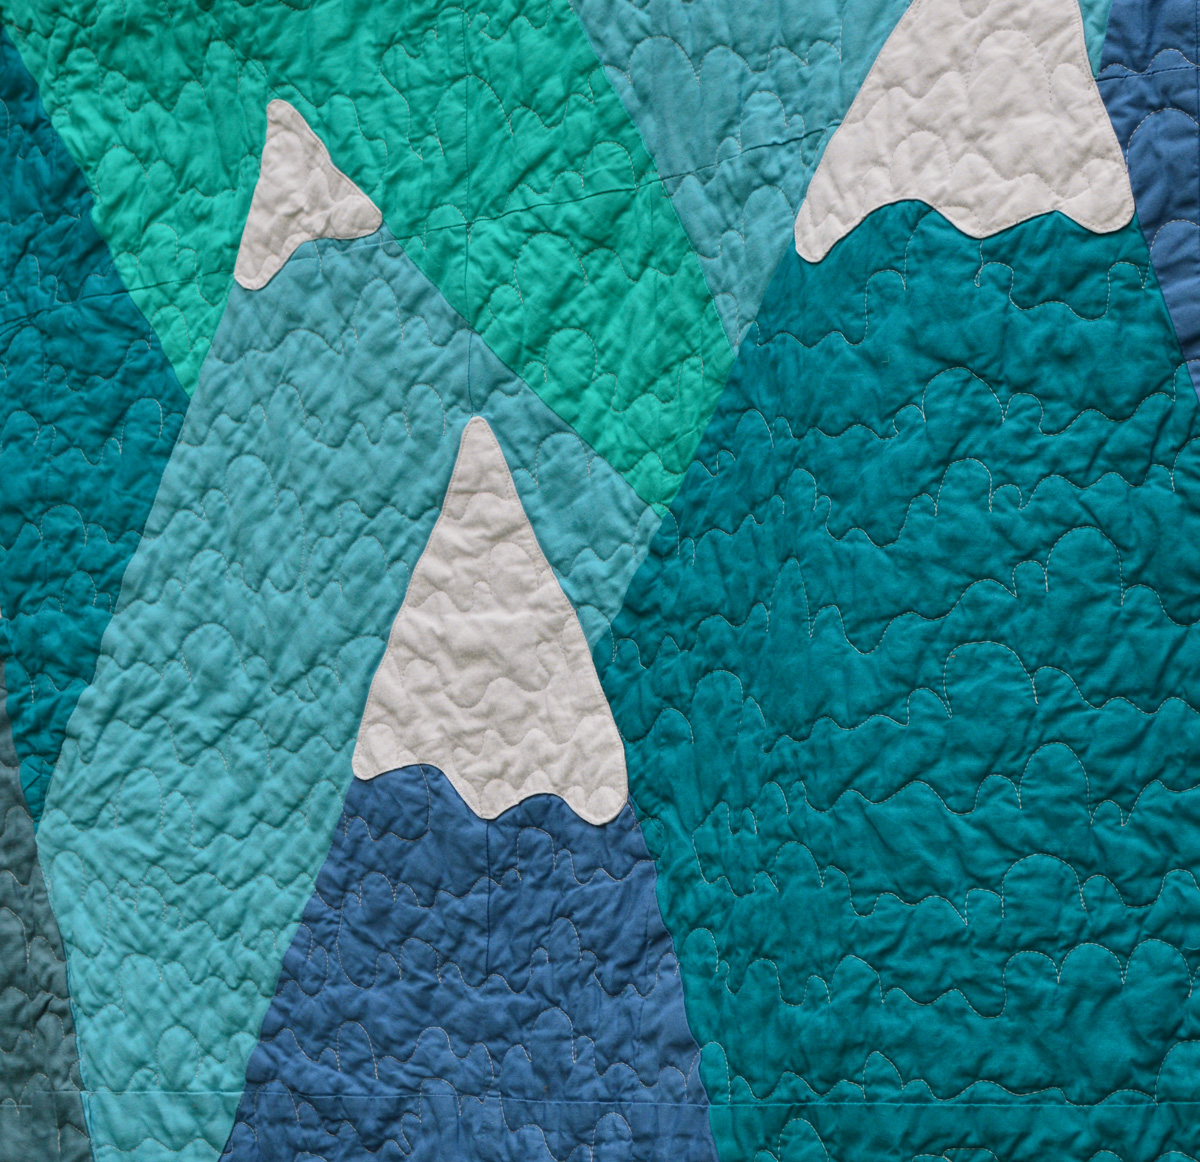
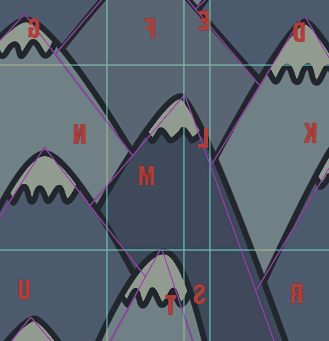
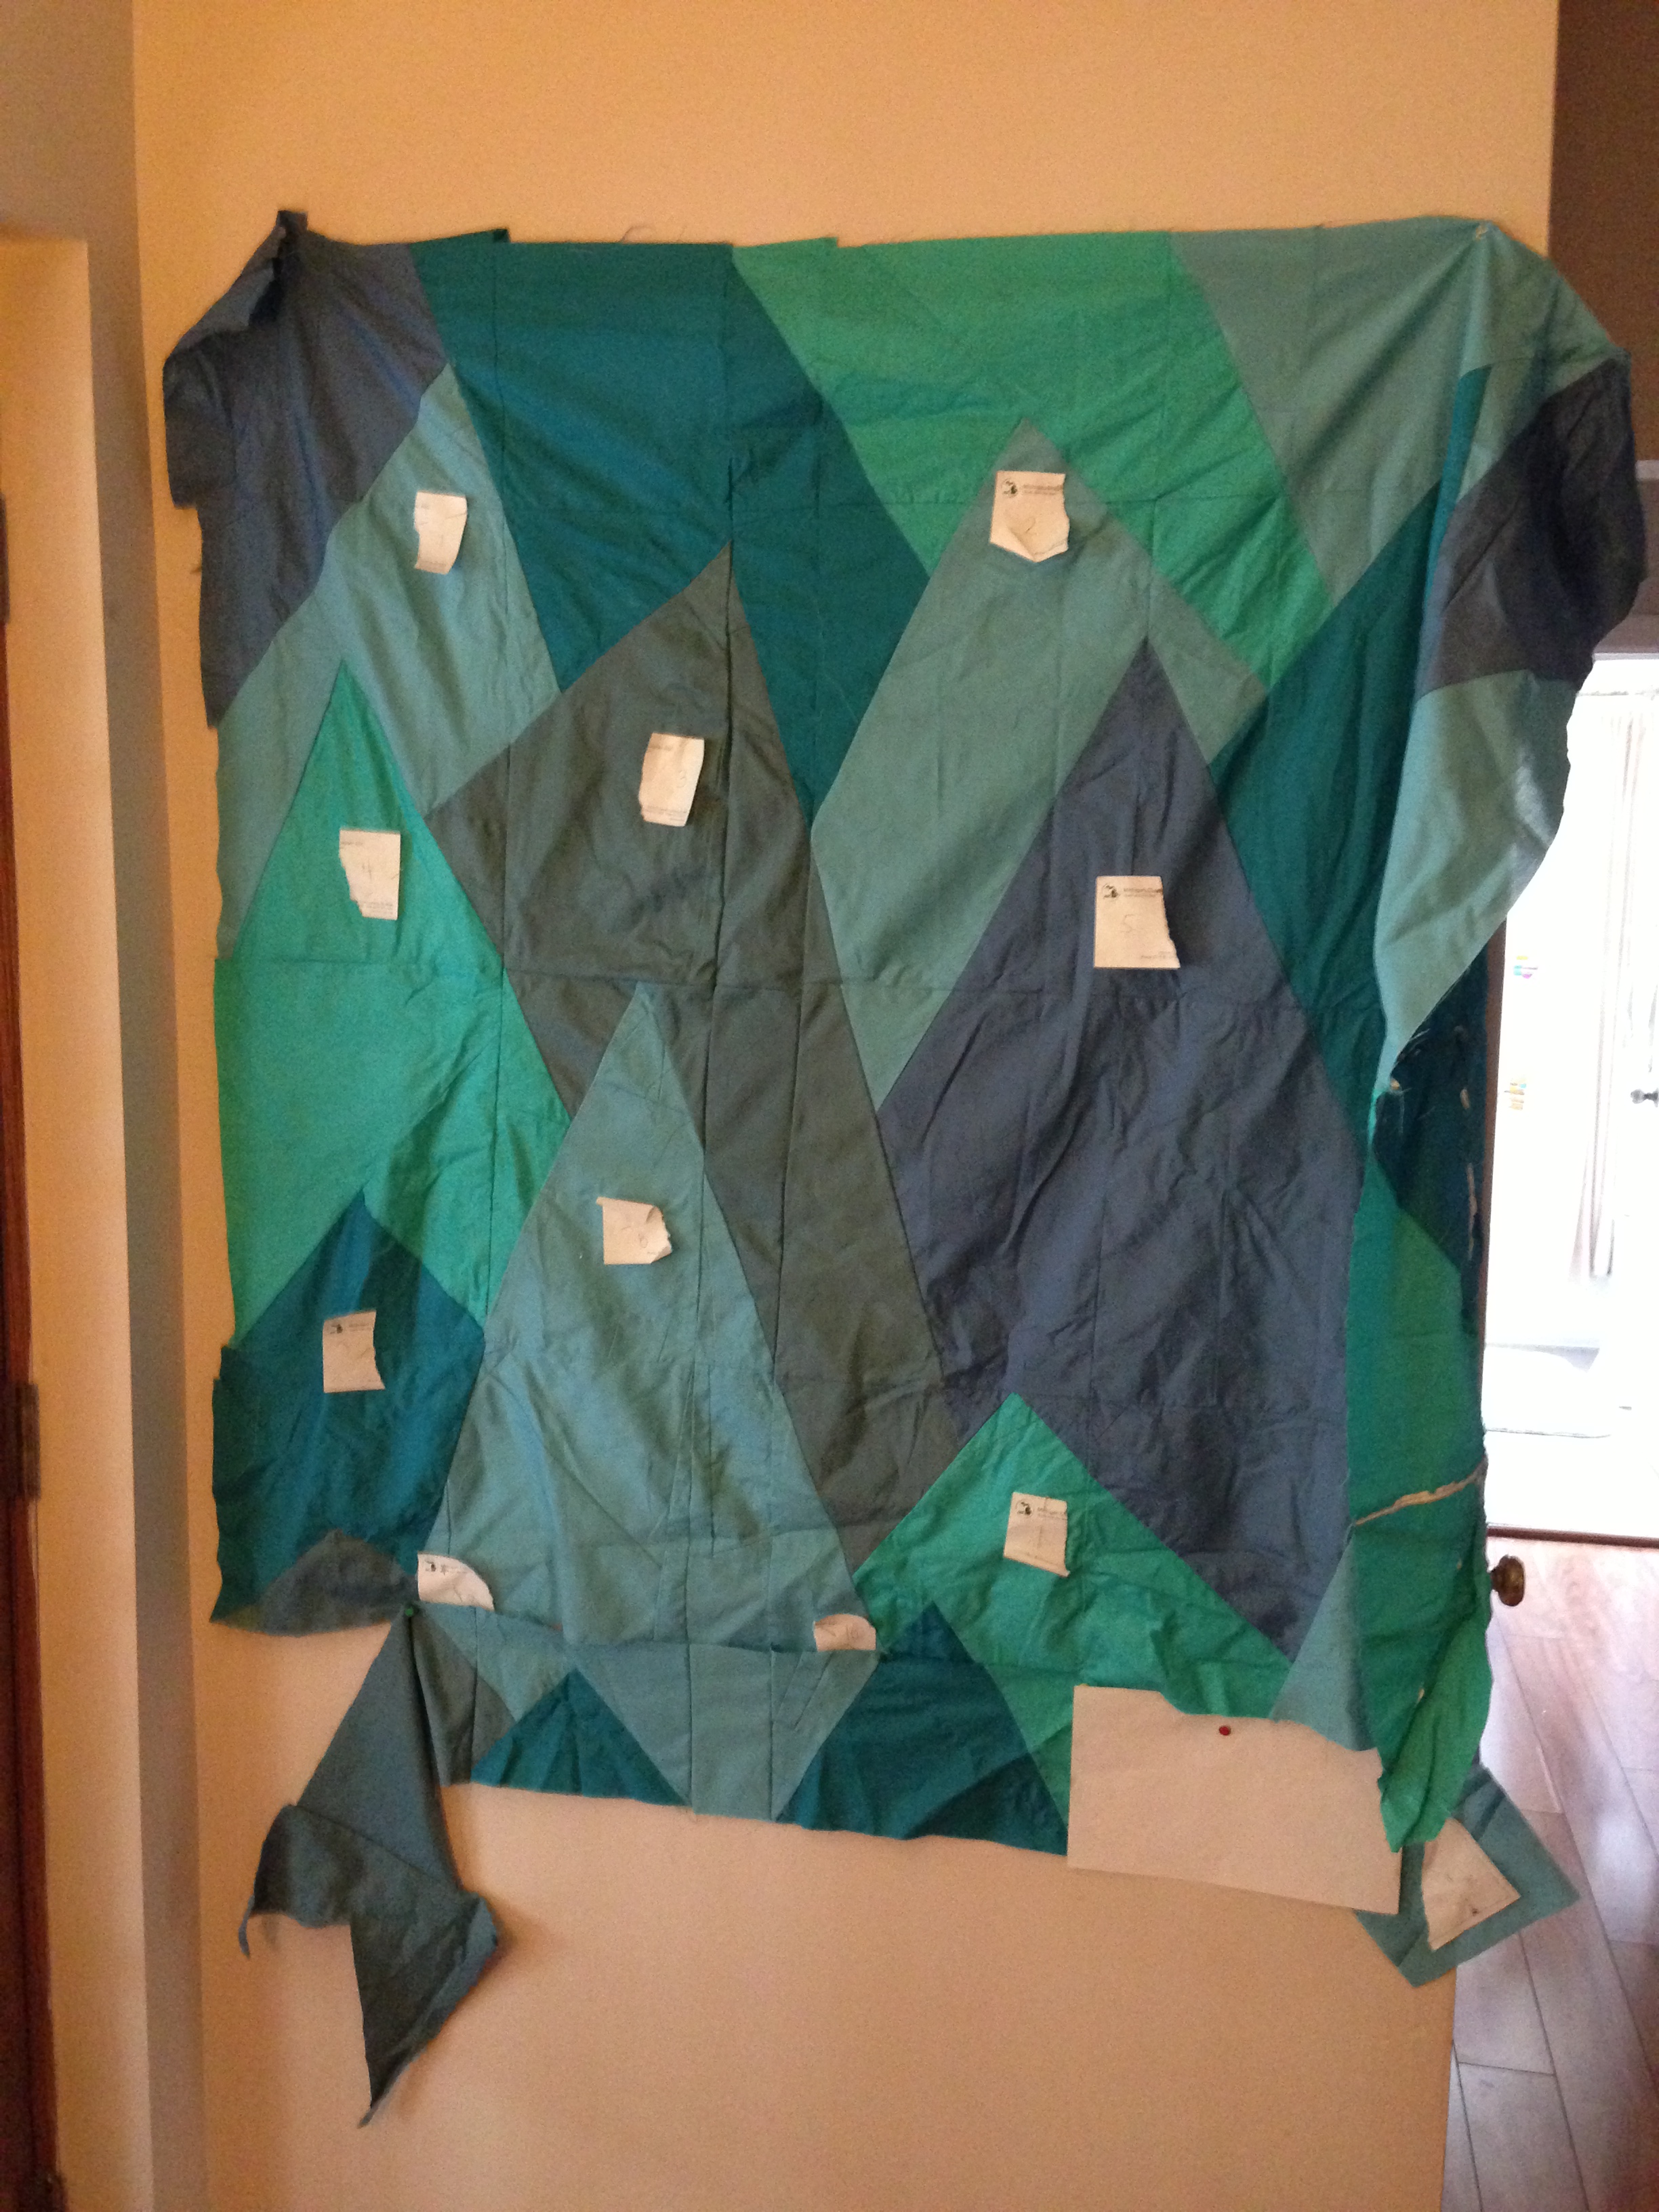
This is my technique for joining nonuniform pieces together to form a workable rectangle when making a quilt.  I want to show you how I started combining my birds and triangle blocks together to make large rectangles that could be pieced together for Folded Flock.

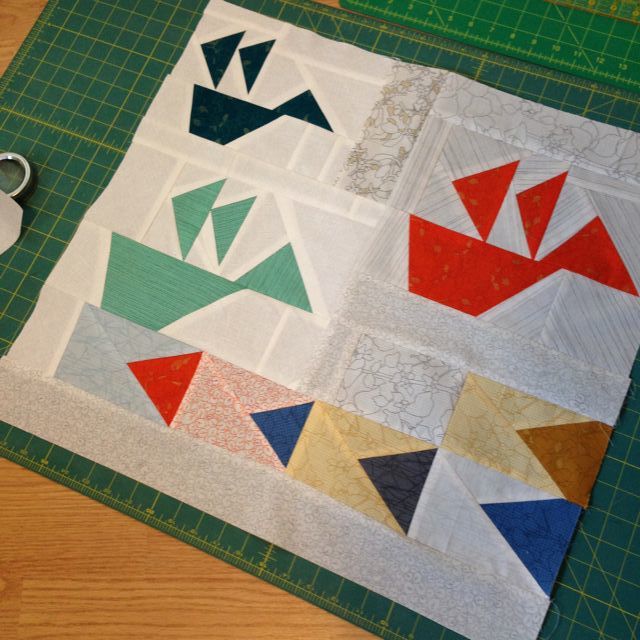
Here is a group of three birds and a cluster of triangle blocks that I wanted to piece together.  I already joined the dark blue and the minty colored birds, adding a strip of fabric first to the right of the blue bird so it’d be the same width as the mint.  I also added a strip of white between the two birds so they would have a bit more space to soar.

part 1

With an intention to stagger the birds and to ensure that the lower row of triangles could fit flush beneath the mint bird, I added fabric to the top of the orange bird and additional fabric to the yellow triangle set.

part 2

I joined the orange bird with the yellow triangle base to the other birds and trimmed the fabrics.

part 3

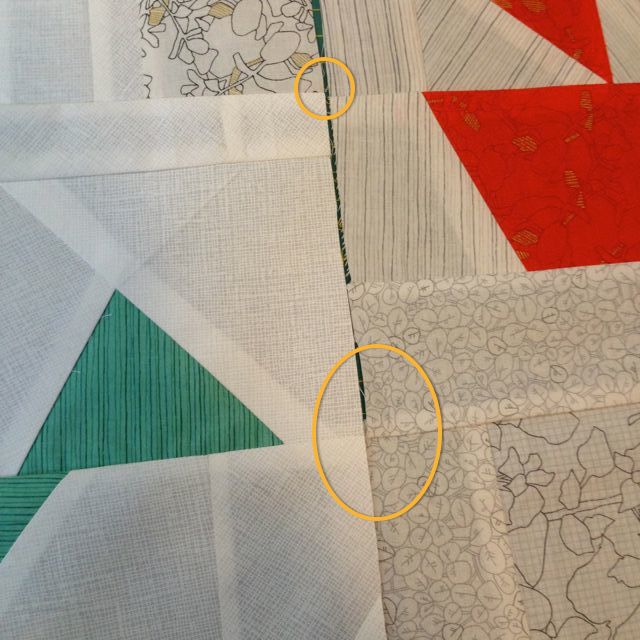
When joining these pieces, I looked for places where I could match seams.  The below aligned perfectly because I am good with the cosmos and luck is sometimes on my side.  I learned from Amanda Jean of Crazy Mom Quilts that having seams either match or decidedly NOT match (meaning 1/2″ or more “off”) is the best way to ensure an eye-pleasing quilt. part 3-1

I needed to add a bit more fabric to the bottom row of triangles, and I matched the seams so that the white and blue triangle block could align directly below the yellow and yellow block.  An additional strip of fabric was joined to the bottom.

part 4

Lots more information can be found in my original post here.

So there you go!  This quilt was designed with the intention that I would be adding light printed fabrics to my original pieces in order to join my elements together as a whole, and this is how I did that!

1 Comment

Filed under Fabric, Techniques, Tutorial

Tubular Bandana Buff Tutorial

IMG_1820

Where it around your neck!

Yay for Spring!  I actually like yardwork and gardening quite a bit and nothing helps keeping hair out of your face, bugs of your neck, the sun from burning your ears, or sweat dripping everywhere like the perfect bandana!

IMG_1822

Gardening style- keeps hair up and ears covered.

It’s totally TUBULAR like they wear on Survivor.

IMG_1826

Stoner beanie! Or bold fashion turban! Or crazy bag lady!

The most popular brand of these is BUFF brand.  They are seamless tubes so they must loom their own tube-tastic fabrics or something.

IMG_1828

Apocalyptic home improvement expert!

But you can make one with simple jersey at home on a basic sewing machine!  Let’s make ours with a sort-of-kind-of-flat felled seam / french seam.  Read on for the tute.

IMG_1829

Girl with the pearl earring!

Continue reading

7 Comments

Filed under Clothes, Pattern, Techniques, Tutorial

Catnap Dress Contest

DSC_3444

Lizzy House had the best idea ever to hold a dress contest for her fabric line Catnap.  Participants chose to either make an adult dress or one for little girlies.  I opted to sew myself a full skirt sleeveless dress, perfect for wearing to cat tea parties:

dress-1

The pattern is Simplicity 1873 by Cynthia Rowley, Style B.  I had to merge two sizes in order to get the perfect fit and I added an inch to the bodice length.

dress-3Nope, these aren’t my kids.  I went to a girls-only party at EmmmyLizzy’s so I could hang with these darling ladies in their Catnap dresses!

dress-2

More pictures and one tip for sewing pleats after the jump!

Continue reading

11 Comments

Filed under Challenges, Clothes, Fabric, Kids, Pattern, Techniques

Riley Blake Challenge Quilt

Hello! Here is my entry for the Riley Blake Modern Quilt Challenge.  I call it Riley’s Cloud:

fullHappy little cloud bumps made using my sew-and-turn applique method explained here. 

It’s not blanket stitch, not raw edge, not needle-turn – it’s sew and turn and it’s my favorite!

close

Can you see the scallop quilting?

back-1

There are four cloud outlines hidden in the white.

close-2

A little splash of color against our milk sky, our snowy roof-tops, and the black, bare trees.

full-2

This quilt was made for the MQG Riley Blake Challenge.  Members of the modern quilt guild were sent fabric bundles of Riley Blake designer quilting cottons.

The Ann Arbor Quilt Guild is also having a challenge!  Our members will pick a favorite and win a stack of fabric!

More pictures after the jump:

Continue reading

2 Comments

Filed under A2MQG, Challenges, Fabric, Quilting, Techniques

Vintage Hanky Quilt

My mother-in-law gave me a box of beautiful handkerchiefs that once belonged to her grandmother. I pieced them into a quilt to give to my MIL for Christmas this past December.

hankyTo make a quilt with handkerchiefs, I found it helpful to stabilize the hankies with fusible light-weight interfacing before cutting them into half-square triangles. I am so floored by how colorful and lush the hankies look when you cut them down!

hanky3

The solid I used is either Kona Bone or Kona Ivory… who can keep track of such things 😛

I call this quilt “Grandma Love” because it is both a way for my MIL to remember her grandma, but also a token of my appreciation for my boys’ Grandma Gracie.  She is such an absolutely amazing grandma to those kids.

hanky2

I used an all over magnolia quilting pattern.  I backed the quilt with a vintage sheet I bought from the lovely EmmmyLizzy via her etsy shop.

hanky1I bound the quilt in the same neutral Kona whatever  : )

Have you played with incorporating sentimental, non-quilting fabrics into your sewing projects?  I’ve got a stack of my husbands old work shirts I plan on playing with someday.

Thanks for stopping by!


1 Comment

Filed under Fabric, Quilting, Techniques

Make a Jorna with me!

I’m teaching a class at Pink Castle Fabrics all about sewing with stretch knit fabric.  AND WHAT BETTER WHAT TO LEARN ABOUT SEWING KNITS THAN BY SEWING A JORNA!  ::fist pumps::

ashley4

Make a jumper! Wear it with jeans!

In this class participants will be given the complete pattern for the Jorna dress, the Jorna junior, and the maternity-style Jorna. Throughout the class you’ll learn tips and techniques for working with jersey knit, how to do an all-in-one bodice lining, and you’ll leave with a finished garment!

The Jorna dress comes in sizes XS-XL for women, 2T-5T for toddler aged girls. The “Knocked-Up Jorna” is for pregnant women sizes XS-XL (pre-pregnancy sizes). The patterns come with length options, making this a garment you can make again and again, achieving different results that are always flattering.

dorie2

Make a dress!

Prerequisites: Students should be comfortable sewing a straight stitch on their machine. 

Price per student:  $60

Length of class:  Meets once for 3 hours

This class will be taught on:  Saturday, September 28, 2013 // 10:30am – 1:30pm

BOOK YOUR SPOT! 

brenda1

Make a sexy and comfortable tank!

penny2 copy

Make a Jorna Jr.! 2T – 5T!

maternity

Cover that bump! Luxe Knocked-Up Jorna is super awesome.

Leave a comment

Filed under Clothes, Fabric, Shop, Techniques

Mountains Quilt

mountains

mountains2

For a friend, I was asked to make a quilt inspired by these gorgeous wall decals from blik. The pattern for these wall tiles, called “Conquered” is based on a Threadless pattern by Ross Zietz. Mr. Zietz was extremely generous – I reached out to him on flickr to get his blessing to make this one quilt and for permission to blog about it, and he was kind enough not only to encourage my endeavors, but he also sent me his design documents!

This made it so much easier to formulate my plan for “conquering” this project.

I photoshopped guide-lines on the tile until I had pieces that were nice rectangles that would be paper-piecing friendly.

guide

Okay so then I printed out that guide and went to the floor with a giant piece of paper (wrapping paper taped together to be roughly 60″ square) and I translated my guide with pencil onto the paper by scaling, just like you used to do in grade school. Something roughly like one inch squared on my guide was equal to 7 inches square on my giganto paper.  I fudged things here with layout and color from the original design in order to work best for me.

IMG_0312

Then I cut out each rectangle and those were my paper piecing pieces (although I had to be conscious about adding seam allowance when I was actually cutting out fabric and the resulting “blocks”). From then on it was just assemble blocks and get a quilt top.

IMG_0424

Then I used my sew and turn appliqué technique to make the snowy mountain tops, and top stitched those onto the quilt-top.

Cloudy quilt lines.

upclose

Cloud fabric and stripped pieced backing.

back

Skinny purple binding.

IMG_0475

Lovely quilt. Thanks, Ross!

DSC_0007


16 Comments

Filed under Quilting, Techniques

Pants to Skirt and Blind-Hem Tutorial

Do you have a whole bunch of ill-fitting clothes still taking up space in your closet?  Once again I found myself reluctant to give away a pair of pants: they were from The Limited, bought in 2007, 2 sizes too small, but in great shape and buttery soft.

And, as I mentioned in my last shorts-to-skirt tutorial, I really need the warm-weather bottoms! I decided to use more of that stretch sparkle denim for my side panels.  But this time I used the reverse side of the fabric which is a bit more gold than blue.  Saucy!

SONP-2I followed the same procedure as last time for making this skirt.  The only difference was that this time I did a blind-hem stitch on my machine!

I think I tried to do a blind-hem on my machine once before, but I decided to take this opportunity to really learn this skill. If you’re new to the process as well, here’s a tutorial on how to sew a blind hem by machine!  Read on…

Continue reading

Leave a comment

Filed under Clothes, Supplies, Techniques, Tutorial