
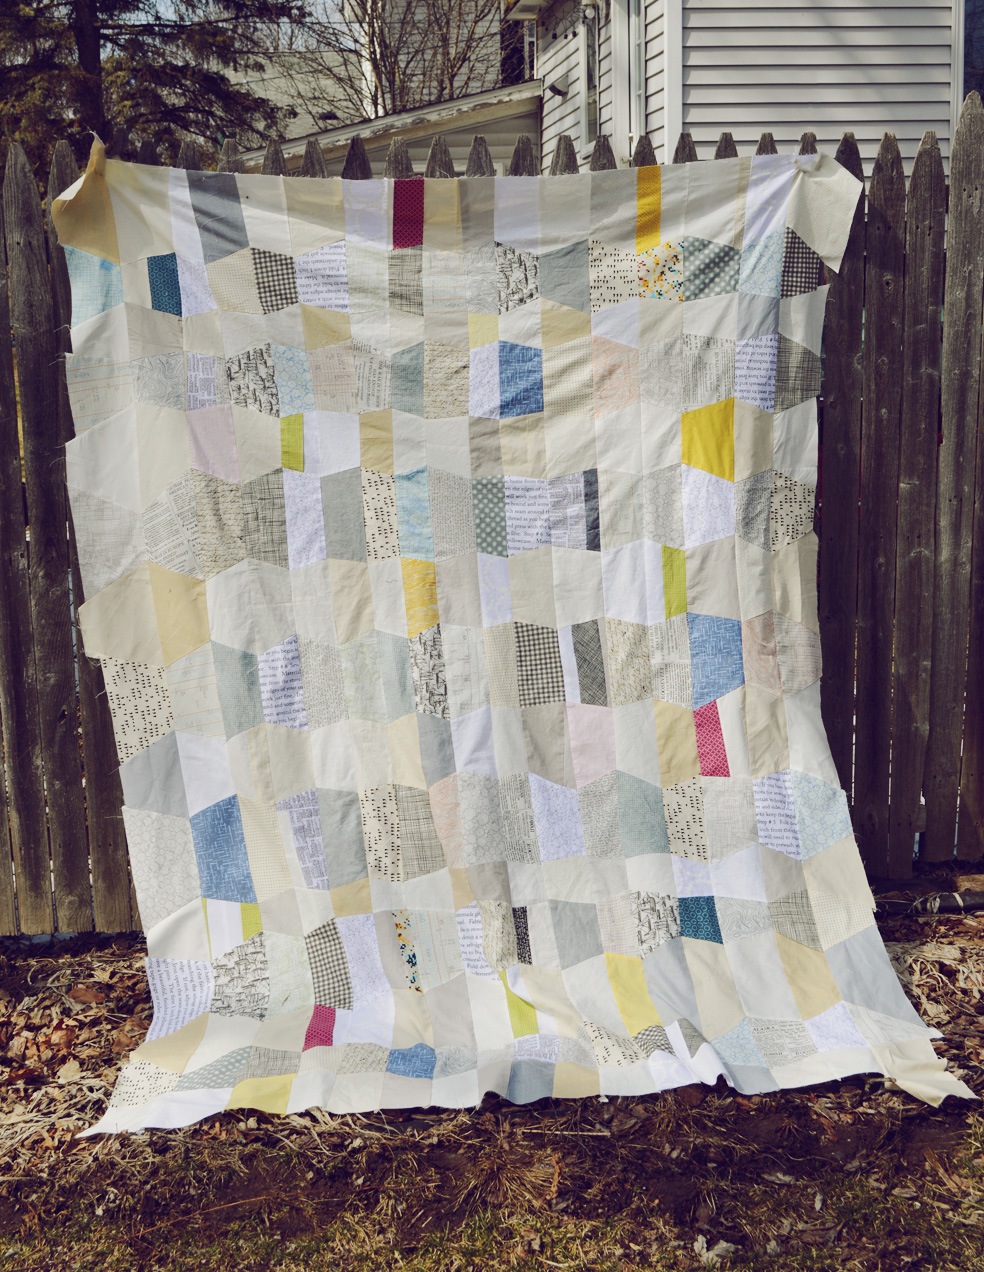
After seeing THIS IMAGE float around pinterest ( “Trapezoid Love” by Melanie Mikecz), I knew I wanted to do a wonky tumbler quilt. And, like the inspiration piece, I wanted my points to match. Wow… how was I going to make a liberated trapezoid quilt (no meticulous calculating and template-making), and still get the points to match?

It took a couple of unsuccessful trial runs before coming up with this method. It’s not for everyone – at the end, you’ve got the entire quilt-top in your lap and you’re completing seams and wrestling and it’s a bit gnarly. But I LOVE the final product. I see more of these in my future…
I’ll chat a bit more about this quilt when I finish quilting it and binding it, but for now – a full tutorial! I have no idea if the below will make any sense, but I tried my best and… you know… it’s free for you to read.
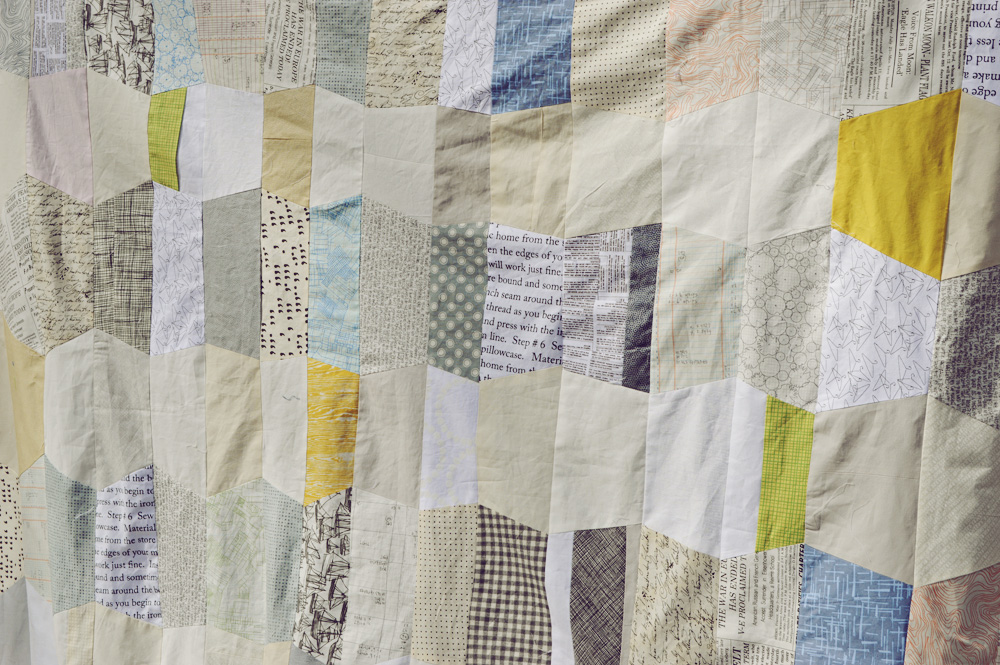
Using this process, you can’t really cut out shapes ahead of time and you can’t plan ahead and you can’t chain piece. You’re building this whole quilt one trapezoid at a time. The only planning I did was making a pile of “Work” texty fabric and a pile of more solid, muted fabric (with a couple splashes of color). To achieve the look of my quilt, alternate between Texty prints and solids.
Make a column of trapezoids. Don’t calculate, just party. Stop when you have your desired length for your quilt.

Cut out two shapes with complementing slopey sides

Matching the slopey sides, lay right sides together and sew alone the angled side.

Cut a new shape (yellow) and cut an angle on the end of shape #2 (tan). Sew them together using the same method.
So once you have your starter column, I recommend viewing this as the center column. You’ll now add columns to the right and to the left, alternating sides as a way of attempting to control the balance of the quilt, until you are at your desired width.
Start a new column. Lay a new shape over your first column. Fold the trapezoid over itself (outlined in yellow) at the desired angle and so that it will hit the below trapezoid at approximately 1/4″ so the point will match when everything is sewn together (see the green arrow). Make that a good crease. If necessarily, mark the crease further by using a marking pen on the wrong side of the fabric. Cut the next new shape at the appropriate angle (see red arrow). This is just a loose reminder of the desired finished angle. 


You have the NEW trapezoid underneath so that you can see that crease and use it as a sewing guide.


Once you have about four trapezoids in your new column, it’s time to attach it to its neighbor column. Lay the columns right sides together with your new one on top. Pin where the points should meet. Stop sewing in the middle of the last trapezoid so that you’ll be able to flip it up and keep adding trapezoids.

So you get into a rhythm… attach four trapezoids, sew them to the other columns… add four more trapezoids, sew them to the column, following the previous seam. I did this because it gets a little unruly and difficult to match the points if you have more than four unattached trapezoids.
Once you finish a column, go to the other side and do it again. You’re building from the center out so that you can keep an eye on the balance of the quilt. Occasionally, put your growing quilt top up on a wall and see what will be needed for the next two columns. More color? Less color? Pink up top and blue on the bottom? It’s a challenge! You’re building the entire quilt sporadically. You’re living in the danger zone and you LOVE IT.

Once you have a new column on each side of your center column, press it, starch it (I REALLY recommend starching this HEAVILY as you go).

and keep going till you’re at your desired width!


Great quilt! I’m impressed that you persevered to make this, I know I would get fed up after only a short while in. Kudos to you 🙂
Thanks, Helen! It was a bit crazy, but I got into a rhythm and it all worked out. The things we do to get the results we want!
This is a great quilt and really easy to follow instructions! Thanks!
Thanks, Kris! I’m so glad you thought the instructions were easy to understand… I really didn’t think I was making any sense! xoxo