
 I’ve done this before, but here we go again! Here’s a tutorial on how to turn those too-tight shorts into a skirt! We can easily make a nice pencil skirt out of shorts, and even give it a bit of an A-Line with the help of some side-panels.

I’ve gained my share of inches around the hips in the past 5 years. I blame babies, beer, and the general annoyance of aging. So I’ve got lots of shorts laying around, but not enough that fit. Now that is officially the temperature of molten lava, time to increase my warm-weather wardrobe!
Read on for a full tutorial…
Supplies: Use a jeans needle and a walking foot if you have them.
Tutorial: Here are my small shorts. SIGH.

Cut along the inner-leg-seam. Up one leg, through the crotch, down the other leg. Then lay the shorts like this:

No more inseam.
Groovy. Now you need to smooth out these curves. Taper to a straight line below the zipper in the front to avoid a poof in the center of the skirt that might look like a wiener.

No more crotch and butt points.
In the back, it’s easiest to just go ahead and cut through the waist band, removing any belt loops and as much of the excess fabric as you can (like the tags).
Sew along these lines with a half-inch seam allowance. For the front, taper your stitches from as close to the zipper as you can down to the hem. Just do a basting stitch to start.

Super skinny pencil skirt!
Depending on how close your original shorts were to fitting your waist, these may fit now. With a back-slit to allow movement, you could stop here and have a skinny little pencil-mini. If so, go over your basting stitches with an overlock or dense zig-zag stitch. You’re done!
If you’re like me, this skirt is still way too small. We need more fabric! Here’s how to add side panels to the skirt. For the side panels, I recommend using a fabric as close in weight to the shorts fabric as possible. I happened to have some stretch glitter denim in my stash for reasons I no longer remember or can rationalize. However, it’s perfect for this project.
Before going to the next step, I recommend sewing down the pocket holes and cutting out the pocket fabric. You’re sacrificing pockets for a cleaner look.
Go ahead and cut through the side seams of your skirt, removing as much excess fabric as possible, such as belt loops.
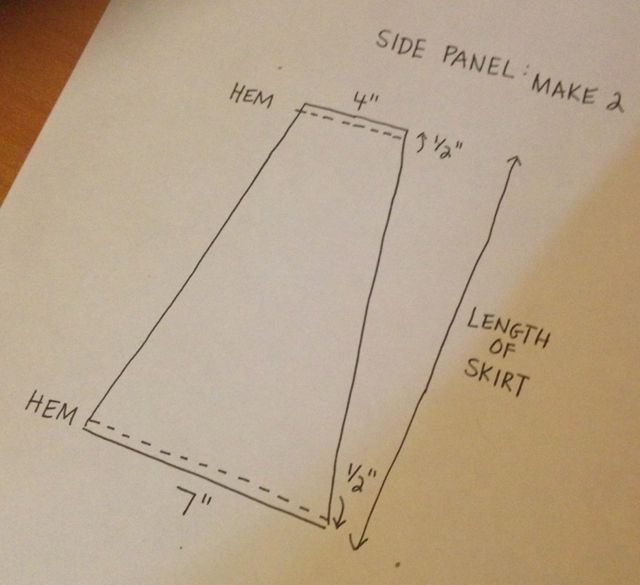
Cut two trapezoids, one for each hip. The top edge should be considerably more narrow than the bottom. When drafting these shapes, consider how many total inches you need to add to the skirt, plus 1 inch seam allowance for each side.
I needed to add 6 inches total to my skirt – that’s 3 inches per side. So my trapezoids needed to have one side be 4″ and the bottom to be 7″ to allow for movement. . The height of the trapezoid should be the same as the height of your skirt’s side seam, plus one inch! Fold the top edge under and hem 1/2″ and fold the bottom edge under and hem 1/2″.
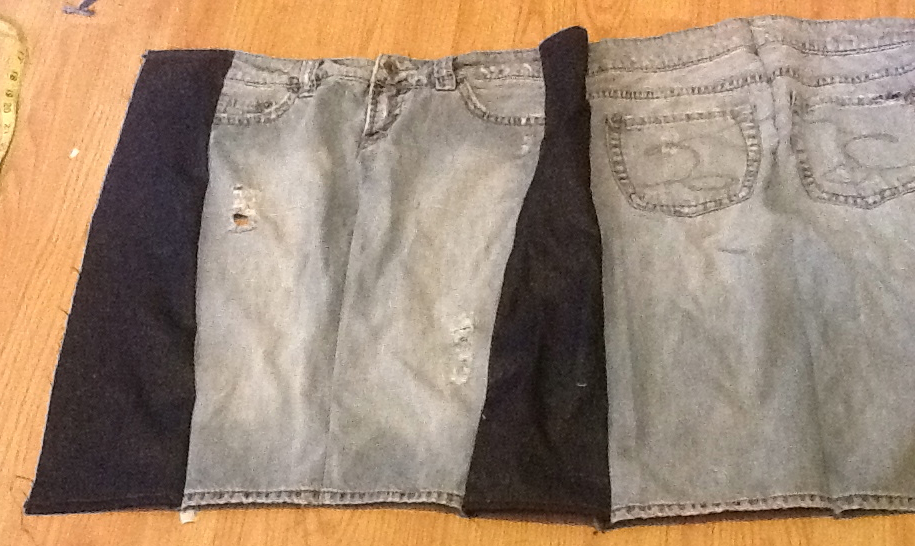
Sew these panels to your skirt sides, always keeping right-sides together. Again, first do a straight basting stitch, then once the fit is correct, go over with an overlock stitch.


Rump!
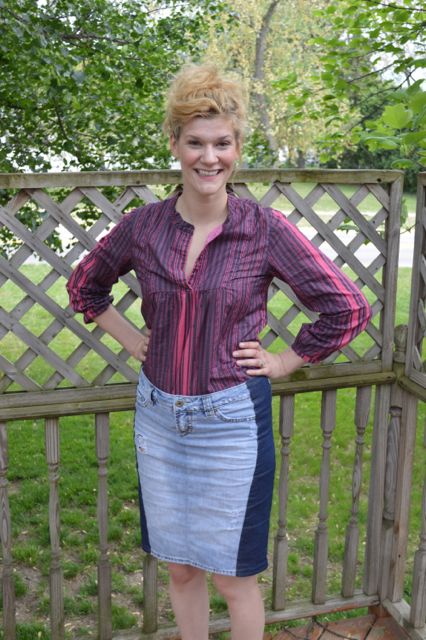
Yay! Comfort! Style! Grace!

